How to configure Azure Active Directory with IdentityServer4


These instructions assume that you have already got the IdentityServer4.Quickstart.UI working on your machine. I will be documenting how to get that working soon and will link to it here once it’s complete.
- Log into your Azure subscription via https://portal.azure.com
- Create a new instance of Azure Active Directory
- Click All Resources > Add
- Enter “Azure Active Directory” into the search and select it
- Click Create
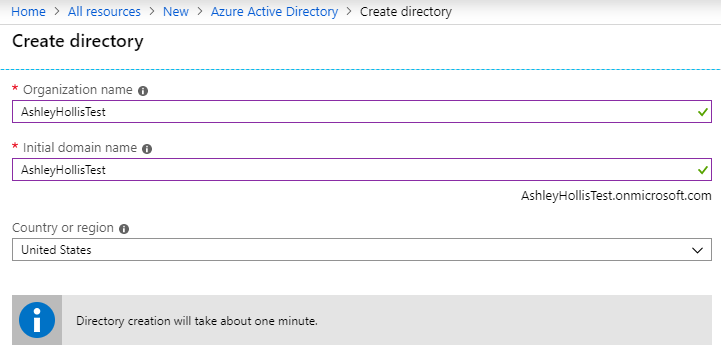
- Enter required details.
The Intial domain name will be your tenant name
- Once completed click on the Click here to manage section
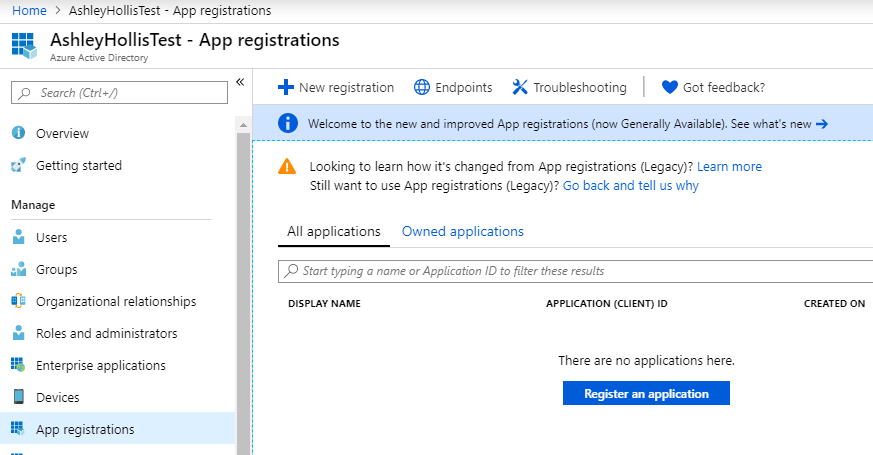
- Register your application with your new Azure Active Directory tenant
- Click App Registrations > Register an Applicaiton
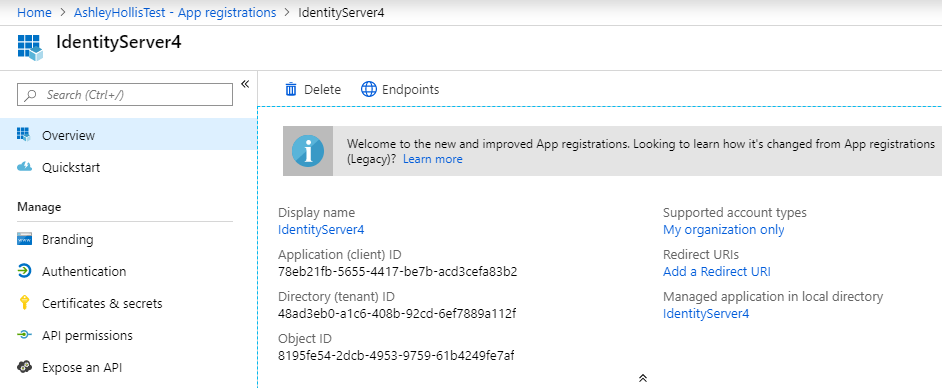
- Enter required details You can use anything for the name but I used IdentityServer4 Leave Accounts in this organisation directory only checked Leave the redirect URL blank. We will fill this out shortly.
- Make a note of your Application (client) ID and Directory (tenant) ID values
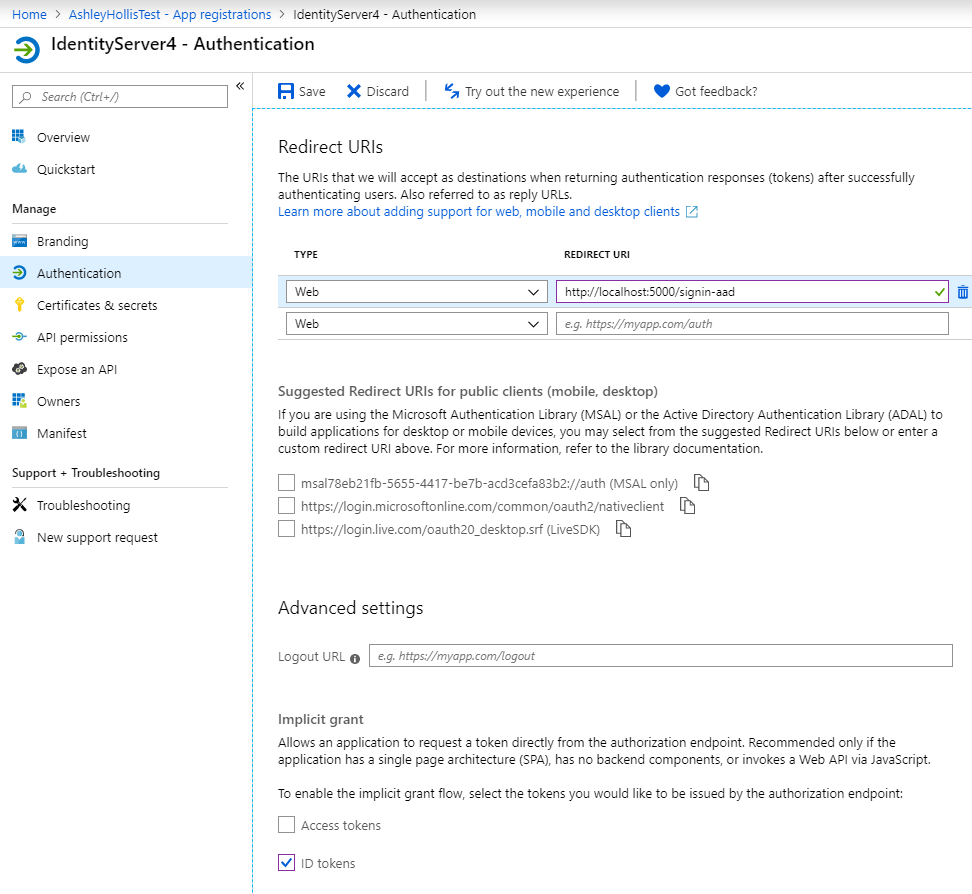
- Click Authentication
-
In the Redirect URI field enter the callback path configured in IdentityServer4 for Azure AD auth. Don’t worry if you haven’t already configured this as there are instructions futher below. This will be something like http://localhost:5000/signin-aad. You can find this in the IdentityServer4 project in the Startup class in the ConfigureServices method. For example this is what mine looks like.
services.AddAuthentication() .AddOpenIdConnect("aad", "Azure AD", options => { options.SignInScheme = IdentityServerConstants.ExternalCookieAuthenticationScheme; options.SignOutScheme = IdentityServerConstants.SignoutScheme; options.Authority = "https://login.windows.net/<Directory (tenant) ID>"; options.ClientId = "<Your Application (client) ID>"; options.ResponseType = OpenIdConnectResponseType.IdToken; options.CallbackPath = "/signin-aad"; options.SignedOutCallbackPath = "/signout-callback-aad"; options.RemoteSignOutPath = "/signout-aad"; options.TokenValidationParameters = new TokenValidationParameters { NameClaimType = "name", RoleClaimType = "role" }; }); - Check the ID tokens checkbox
- Click Save
- Create a test user
- Enter “Azure Active Directory” into the search and select it
- Click Users > New User
- Enter the required details The user name must end with @YourTenantName.onmicrosoft.com. For instance my test user’s user name is TestUser01@AshleyHollisTest.onmicrosoft.com
- Check Show Password and make a note of the test user’s password.
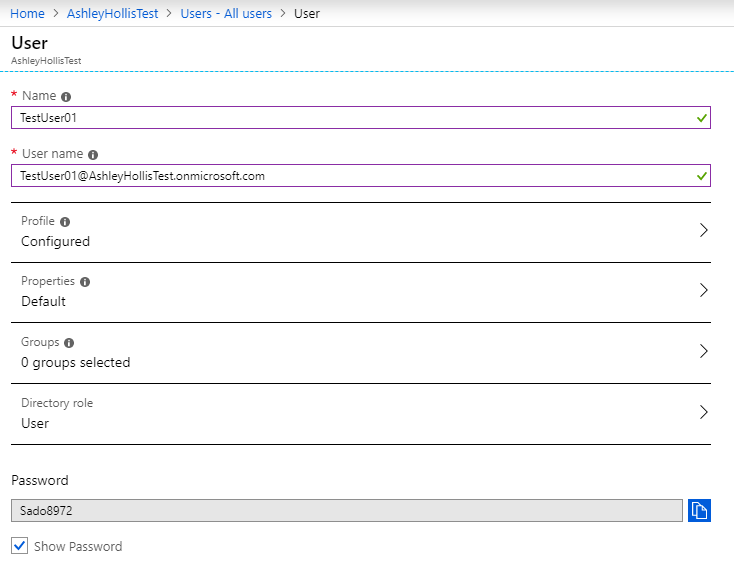
- Click Create
- Configure Azure Active Directory as an External Identity Provider for IdentityServer4
- Open the Startup.cs file in your IdentityServer4 project.
-
Update the ConfigreServices method like below. Ensure that you replace <Directory (tenant) ID> with your Directory (tenant) ID and <Your Application (client) ID> with your Your Application (client) ID.
services.AddAuthentication() .AddOpenIdConnect("aad", "Azure AD", options => { options.SignInScheme = IdentityServerConstants.ExternalCookieAuthenticationScheme; options.SignOutScheme = IdentityServerConstants.SignoutScheme; options.Authority = "https://login.windows.net/<Directory (tenant) ID>"; options.ClientId = "<Your Application (client) ID>"; options.ResponseType = OpenIdConnectResponseType.IdToken; options.CallbackPath = "/signin-aad"; options.SignedOutCallbackPath = "/signout-callback-aad"; options.RemoteSignOutPath = "/signout-aad"; options.TokenValidationParameters = new TokenValidationParameters { NameClaimType = "name", RoleClaimType = "role" }; }); - Browse to your IdentityServer4 application using a web browser (IE. http://localhost:5000/Account/Login?ReturnUrl=%2Fgrants) You should now see a Azure AD button in the External Login section.
- Click on the Azure AD button
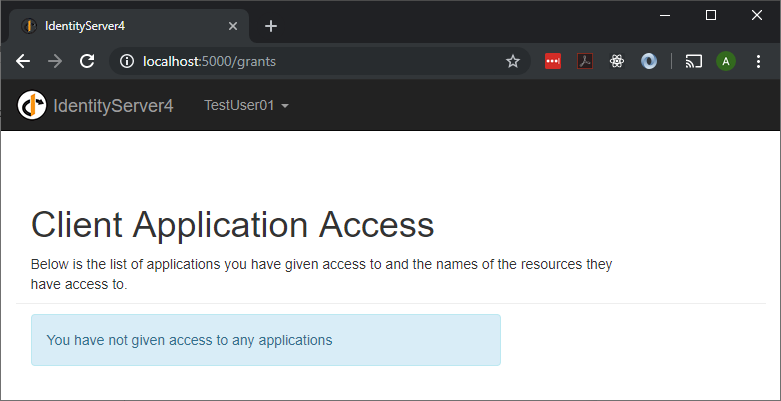
You will likely be automatically signed in with your normal Azure account. You will need to log out and click on the Azure AD button again so that you are prompted to enter the test user’s credentials.
Once logged in your should see a screen like below.


Troubleshooting issues:
- AADSTS700054: responsetype ‘idtoken’ is not enabled for the application.
You need to check the ID Tokens checkbox under the Azure Active Directory > App Registrions > Authentication section

- AADSTS50011: The reply url specified in the request does not match the reply urls configured for the application: ‘ae97ab3b-7cd2-4a6f-a879-900c84e04145’.
You need to enter a valid redirect URL for this application under the Azure Active Directory > App Registrions > Authentication section

References:
https://github.com/IdentityServer/IdentityServer4.Quickstart.UI https://damienbod.com/2018/08/15/implementing-a-multi-tenant-oidc-azure-ad-external-login-for-identityserver4/ https://tahirnaushad.com/2018/05/19/azure-ad-with-asp-net-core-2-0/ https://github.com/IdentityServer/IdentityServer4/blob/5f9c637a8ff2eaf715efb2629ac8c4b08b063b2a/src/IdentityServer4/host/Startup.cs
Subscribe to Ashley Hollis
Get the latest posts delivered right to your inbox